|
Chapter 4 - Advanced Usage of MMEd
This chapter contains a systematic introduction to concepts and features of the MAVA Multimedia Suite and the authoring system MMEd. They are described in sequential order. Using them simplifies the document creation for advanced users.
4.1 The Language Elements
The MAVA-Multimedia-Suite provides four different classes of language elements. These four classes are:
- Media items
- Containers
- Operators
- Effect operators
An element of language class describes the characteristics of a class of language elements. Apart from the general characteristics of a language element class, there are also application-specific characteristics of language elements of an extension (e.g. the extension of the interactive travel guide). Thus each language element of an extension belongs to one of the four classes. On the basis of an example this becomes clearer: The "circle" element, mentioned in the last chapter, belongs to the class of operators. "Operator" describes the characteristic, that it can be connected to other media items. "Circle" means, that it specifies the radius of a sensitive area around a sight. This characteristic results from the area of application the operator belongs to - the interactive travel guide.
4.2 The MMEd User Interface
Illustration 4-1 shows a screenshot of the MMEd authoring system. MMEd means MAVA Multimedia Editor. In the MMEd window you can see the title, the menu and a toolbar. The window title informs about which document is presently opened. Additionally, the document name (not to confound with the file name) is indicated. In the screenshot the document name is "Interactive travel guide". If the file was already saved, the file name is indicated in parentheses. The document shown in the screenshot was saved under the file name "E:\mava dokumente\mava dokumente.mavaed".
|
|
|
Illustration 4 - 1: The MMEd application window
|
The menu bar makes MMEd functions accessible for mouse actions. Each menu option is described in the course of this chapter. In the next chapter the toolbar is described.
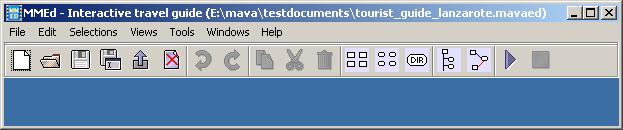
4.2.2 The Toolbar
As illustration 4-2 shows, the toolbar is below the menu bar. It provides a shortcut for the most important or often required functions. If the mouse cursor stays for a while above an button, a tool tip explaining the function will be displayed.
Following functions can be called by toolbar buttons (from left to right):
- New document: Opens a dialog window for the creation of a new file.
- Open document: Opens a document.
- Save document: Saves the document which is currently open.
- Save as: Saves the opened document with a new file name.
- Export document: Saves the document in a playable ".mava"-format
- Close document: Closes the file which is currently open.
- Undo: Undo the last editing step.
- Redo: Redo the last action that was undone.
- Copy elements: Copies the selected elements.
- Cut elements: Cuts the selected elements, they can be pasted in other places.
- Delete elements: Deletes the selected elements.
- Open Operator selection: Opens an operator selection window. It is possible to have several windows opened.
- Open media selection: Opens a file selection window. It is also possible to have several windows opened.
- Select media from a directory: Opens a file selection dialog, by which you can choose media. Import the media into the document by drag & drop
- Open navigator (tree view): Opens the navigator for the opened document.
- Open icon view: Opens the icon view of the root container of the current document.
- Start MAVA Multimedia Player (MMP): Starts playing the current document.
- Stop: Stops playing the document in MMP.
|
|
|
Illustration 4 - 2: The
MMEd toolbar
|
4.2.3 The MMEd Properties
In the MMEd properties you can configure the authoring system. The MMEd properties dialog offers six different tabs, which are particularly described in the following section.
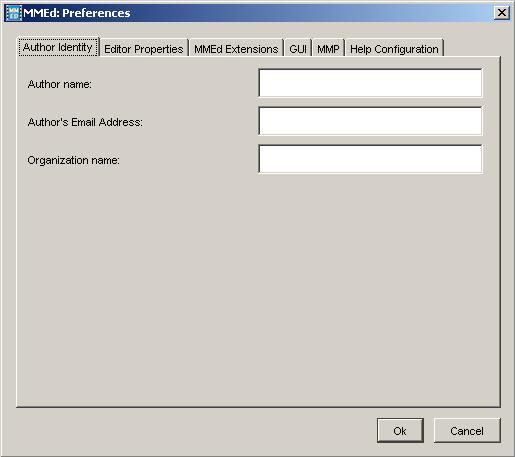
The first tab is the "Author Identity" tab. Here you can specify author data. First, the name of the author can be entered. In each document which will be created in the future, the author name is set automatically. The same applies for the author's email address and the name of the organization for which the author is working.
|
|
|
Illustration 4 - 3: MMEd - Properties - Author Identity
|
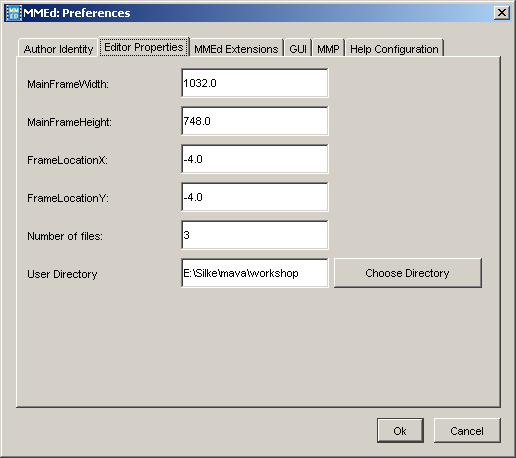
The second tab is the "Editor Properties" tab. Here you can define basic editor settings, for instance, how many documents recently opened, MMEd should remember and offer for loading in the file menu. Additionally, a user directory can be selected. After a user directory was selected, it will always be the starting point within the "Load document..." dialog and the "Save document... " dialog.
|
|
|
Illustration 4 - 4: MMEd Properties - Editor Properties
|
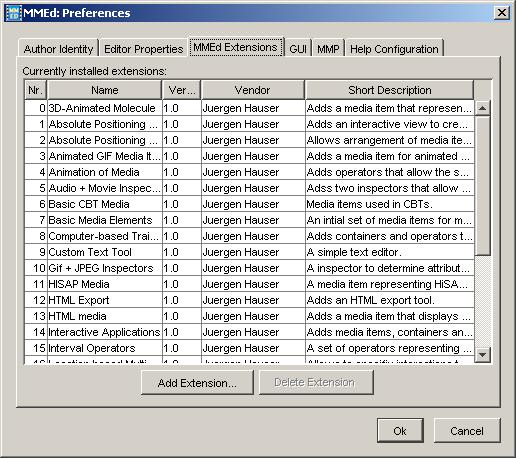
The third tab, "MMEd extensions", gives an overview of installed extensions and offers the possibility to add or to delete extensions. (Unfortunately, if your are using Windows it is not possible to delete extensions by means of this dialog.) An extension is added, if the Button "Add Extension..." is pushed and a file is selected. Extensions have the ending ".jar". You have to download them first from the Internet or to get them otherwise, for example on a CD-ROM. An extension can be deleted by selecting it in the table and clicking "Delete Extension".
|
|
|
Illustration 4 - 5: MMEd Properties - MMEd Extensions
|
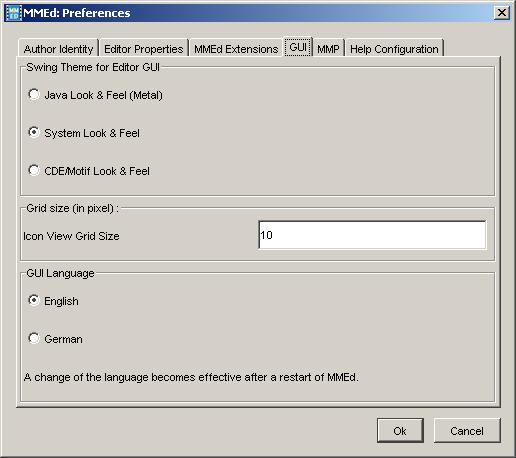
With the fourth named "GUI" (Graphical User Interface) the properties of the user interface can be specified (Illustration 4- 6). First the Look & Feel of the user interface can be specified. It can be chosen between Java Look & Feel, System Look & Feel and the CDE/Motif Look&Feel, which is known from the UNIX world. System Look & Feel is the Look & Feel of the operating system. The Java Look & Feel is identical on all platforms, so the GUI looks the same across all platforms.
In this tab the grid size for the arrangement of icons in the icon view can be set. This will make it easier to place icons in this view.
|
|
|
Illustration 4 - 6: MMEd Properties - GUI
|
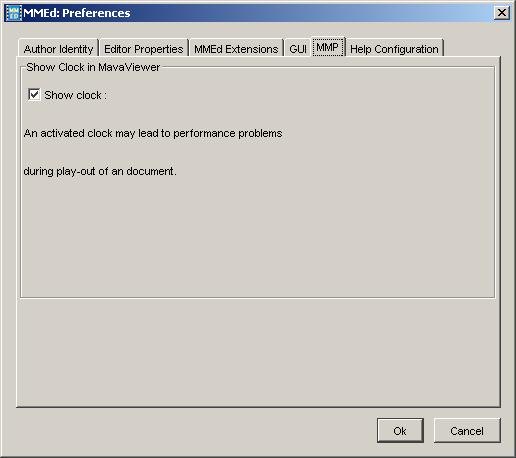
Using the tab "MMP", the clock for the mava view can be turned on or off. If the clock is turned on, a little degration of the performance my be encountered, but this time information helps to analyze multimedia documents.
|
|
|
Abbildung 4 - 7: MMEd Properties - MMP
|
MMEd 1.3:
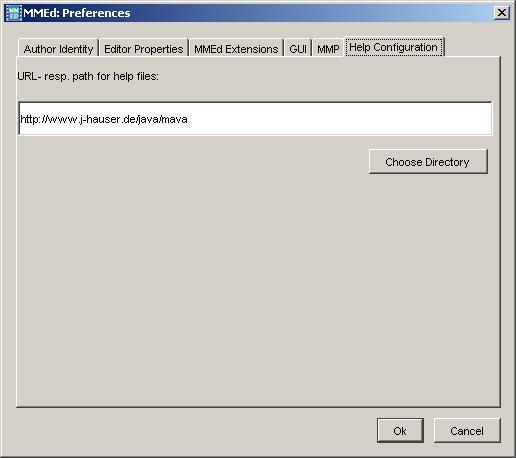
In the tab "Help Configuration" you can change the URL or path to the help files. The default setting points to the Mava Multimedia Suite web site, so you get allways up-to-date information. If you are using MMEd off-line you can download the help pages and change the path with this tab to your new local path.
|
|
|
Illustration 4 - 8: MMEd Properties - Help Configuration
|
4.3 Advanced Features of MMed
To handle larger documents (i.e. documents with many operators and/or many containers) the authoring system offers two features. The first one is the navigator, which gives an overview of document structure and used containers. Additionally there is the feature called "operator filter". Besides that, basic editing commands like copy and paste or undo and redo are supported.
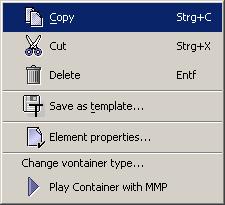
4.3.1 Copy/Paste/Delete language Elements
MMEd offers the possibility to copy, paste or delete several elements at once. The elements have to be chosen either in the icon view or the navigator. In the Icon view one or more elements can be selected by means of a rubber band. Selected elements can be identified by a gray border. Subsequently, these elements can be copied, cut out or deleted by the context menu. Only in the icon view copied or cut-out elements can be pasted again, because for the pasting of elements their new position has to be determined. Pasting is possible by the context menu in the icon view.
If an element is copied, the connections between operators and media items will be copied too, provided that both the media item and the operator are selected. If an operator is deleted, all of its connections will be deleted too.
4.3.2 Undo and Redo of editing steps
MMed provides a Undo/Redo concept that allows to undo and redo all editing steps since loading the document. You can even undo changes for a saved document (in this case you still have to save the document on your own). You can use the tool bar icons or the "Edit" menu. All editing steps like adding or removing document elements, change their position or editing element properties can be undone or redone. To become used to the undo concept change a document and use the undo and redo icons of the tool bar.
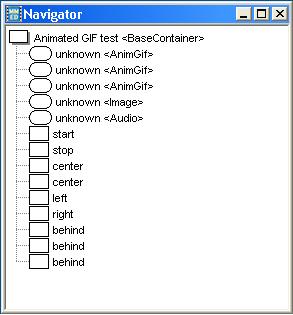
4.3.3 The Navigator
The navigator gives an overview of a document. In this tree all used language elements are represented. A tree results from the fact that a container can contain language elements. The language elements contained in a container are indicated on the level beneath it. Each container can be opened and closed, i.e. the contents can be shown. In the navigator clicking on an element with right mouse button will open the context menu. From here functions like copy, paste and can be called, as well as the element's properties dialog.
|
|
|
Illustration 4 - 9: The navigator
|
4.3.4 Operator Filter
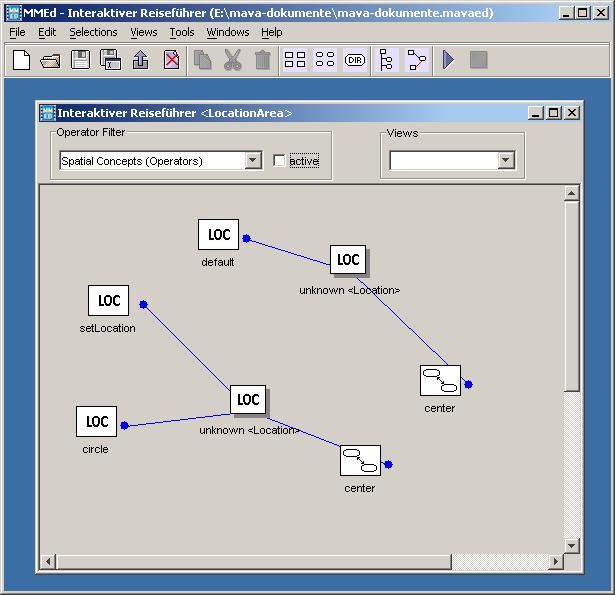
Filters are a concept to reduce the number of visible operators. Operators, which do not fulfil a criterion specified by the filter, can be invisible. This will be clarified on the basis of an example.
|
|
|
Illustration 4 - 10: Without operator filters
|
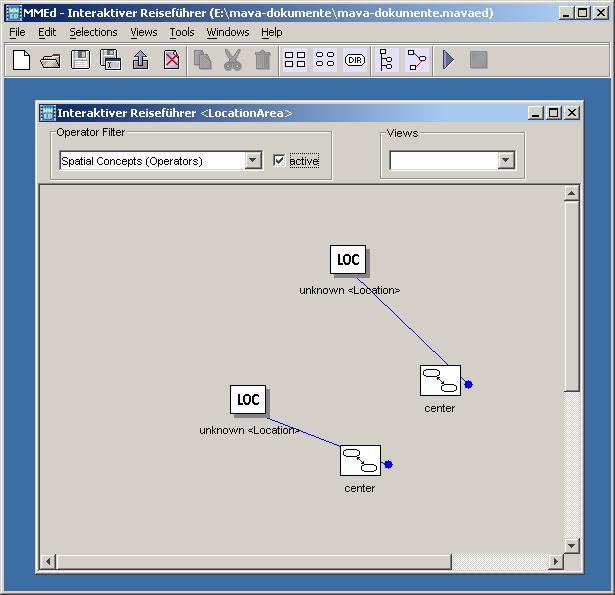
In the following illustration a filter was activated. In the list a filter for "spatial operators" was selected and the checkbox was set to "activated". In contrast to the previous illustration only the two center operators are visible and all other operators invisible.
|
|
|
Illustration 4 - 11: With activated spatial filter
|
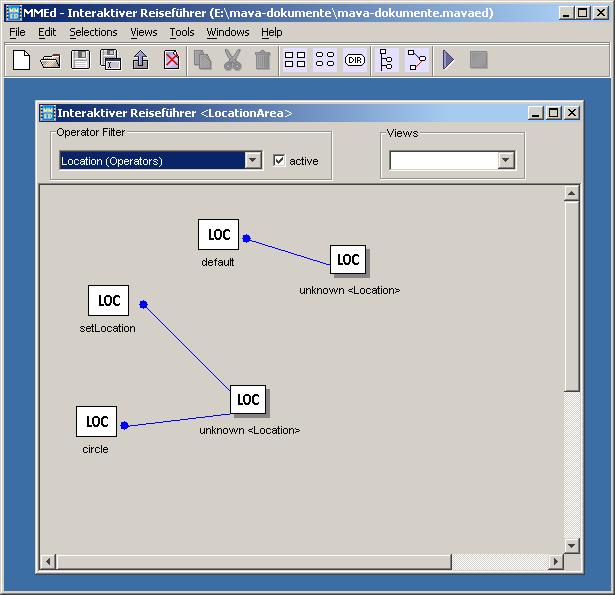
In the next illustration (Illustration 4 - ) the operator filter LocationManager was selected and activated. Now only the operators of the interactive travel guide are visible. All other operators are invisible.
|
|
|
Illustration 4 - 12: With activated "interactive travel guide" filter
|
4.3.5 Handling Containers
Containers are used mainly to structure a document. For the author, they behave like media items, i.e. they can be connected with operators.
4.3.5.1 New Document
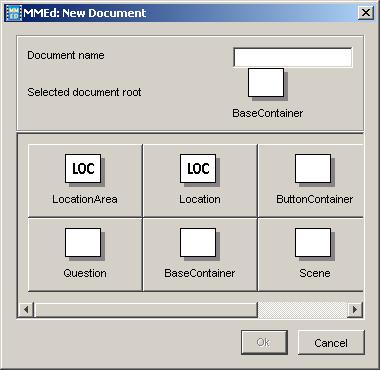
To create a new document, select the menu option "New document..." from the file menu or the first symbol on the toolbar. This will open the dialog shown in illustration 4-13. First you have enter the name of the document. Subsequently, select a container as root container for the document. Except for the BaseContainer all containers are application specific and should be used according to the description. The root container is the basis of a document and contains the specification of the entire document.
|
|
|
Illustration 4 - 13: The "New document" dialog
|
4.3.5.2 Playing out containers
Since it is not comfortable to always run the whole presentation, there is a possibility to play out a single container by clicking the menu option "Play container", which can be found in the context menu of either the navigator or the icon in the icon view. You should bear in mind, that the functional range for some application-specific containers is limited for this feature (e.g. the functionality of buttons).
|
|
|
Figure 4 - 14: Context menu of a container
|
4.3.5.3 Changing container types subsequently
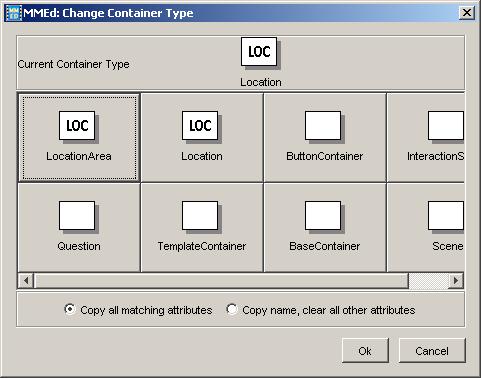
If a wrong container type was selected, the context menu "Change container type" allows to change the container type afterwards by the dialog shown in illustration 4-15. At the top of the dialog the current type of container is represented. Below of it, all available container types are displayed. To change the container type, you just have to select the new one. It is not necessary that both containers have the same attributes and operators. Invalid connections are deleted automatically. In the dialog it can be defined, if suitable attributes (which are available in both containers) are to be taken over or if they, with exception of the name, are to be deleted.
|
|
|
Illustration 4 - 15: The "change container type" dialog
|
4.3.6 Application specific Views
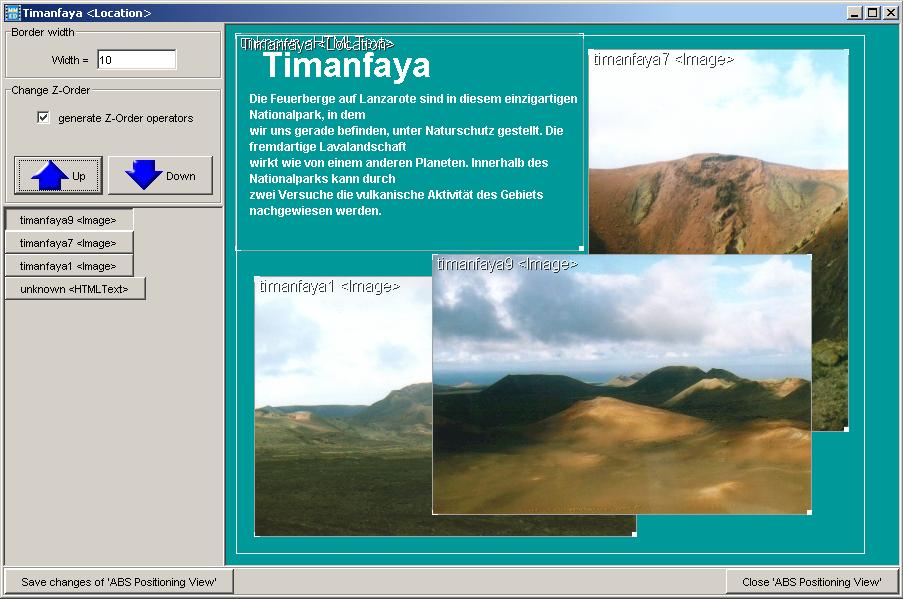
For several extensions MMEd offers an application-specific view in order to simplify the creation of documents, since application-specific views provide a graphical visualization of an application specific concept as well as the operators necessary for it. Illustration 4-16 shows the application specific view for the absolute positioning of media items on the presentation area. The container contains four media items (A to D), whose position has to be determined during the presentation. In this view, this can be done by drag & drop. The overlap of the media items (the z-order) can also be determined. Additionally, the z-order of the media items can be changed by the "up" button and the "down" button.
If the positioning of the media items is finished, the operators corresponding to the graphical visualization can be generated by clicking the button "save change of ' Abs Positioning View '". On selecting the "Close Abs Positioning view" the view is closed and you'll return to the icon view of the container.
|
|
|
Illustration 4 - 16: Example of an application specific view
|
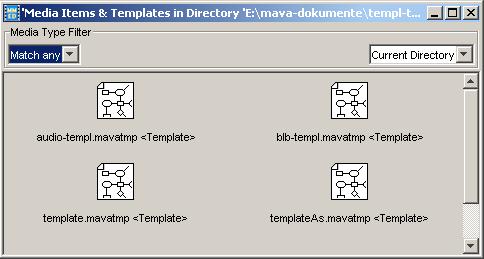
4.3.7 Selecting Media from Directories
To simplify the use of media items, a directory can be selected. All media in this directory, that are recognized to be supported by MMEd, will be displayed in a window. Afterwards they can be added to a document by using drag & drop. This will simplify the editing procedure, because MMEd will ascertain and set the parameters of the media item automatically.
|
|
|
Illustration 4 - 17: The window "Media from directory"
|
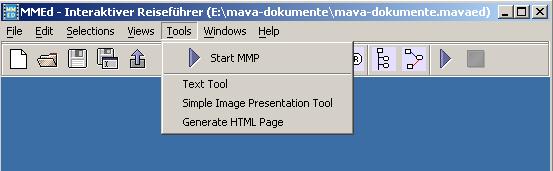
4.3.8 Tools
Not only the specification language but also the authoring system is extensible. Additional tools can be integrated as plug-ins.
4.3.8.1 MMP
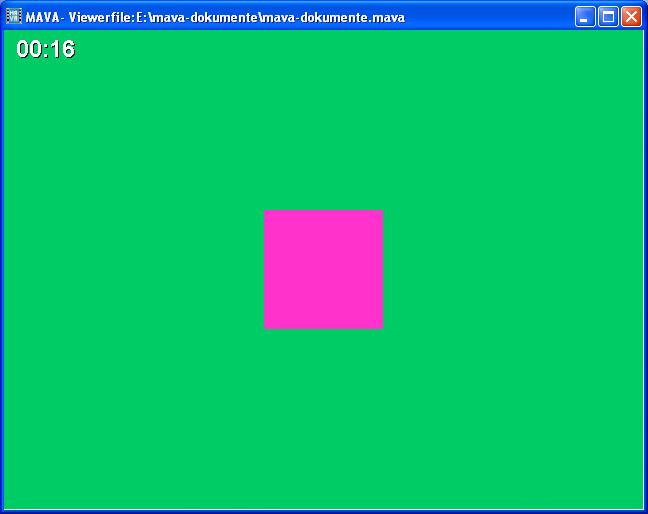
This tool is always available. There is a shortcut to call the presentation system. You can run it by clicking on the menu bar or the toolbar. Pressing this Button, will export the document automatically into the player format and run the presentation in the MMP. In the left upper corner of the MMP window you can fade in a clock, which will help you to examine the temporal behavior of your document. You can determine if the clock has to be displayed by means of the MMEd properties dialog.
In illustration 4 - 18 you can see the document we spoke of in the previous chapter. If you play out the document, you should receive a similar result.
|
|
|
Illustration 4 - 18: The MAVA viewer
|
4.3.8.2 Plug-in Tools
The authoring system MMEd can be extended by plug-ins. This happens in the same way an extension is added. The authoring system is able to recognize if an extension contains a tool and will insert it into the tool menu. In illustration 4-19 you can see that there are three tools installed. Some tools open their own application window, others run in the background. The tool corresponding to the menu option "Generate HTML Page" generates a HTML page which will run the presentation system MMP as an applet and integrate the MMP document in an Internet environment.
|
|
|
Illustration 4 - 19: The Tool Menu
|
4.4 Templates
A template is a part of a document's structure. Regarding MMP documents, templates are media items and containers, connected by operators. They can be stored and get the file extension ".mavatmp" for "MAVA Template".
4.4.1 Use of Templates
Templates, which are usable, are shown in the "Media and templates" window. They can be added by drag & drop to the document like if they were normal media items or operators. By dragging & dropping a template into the icon view of a document, the document structure of the template will be inserted on the place the mouse is released.
Templates can be created by selecting a container or a set of elements and storing them as a template. In addition, either in the Edit menu or in the context menu of the icon view, the menu option "Save as template" can be selected. A file dialog appears, in which the directory and file name of the template can be specified.
|
|
|
Illustration 4-20: Use of templates
|
4.4.2 Placeholder
The placeholder can take over the place of a media item or a container in a document. This offers a higher flexibility in the use of templates, since the placeholder can symbolize any media item or container and can be replaced by a concrete media item or container, after the template has been imported into a document.
It can be connected with operators as usual. It can be connected to any other operator independently from its area of application. If a placeholder is replaced with a media item or a container, MMEd will examine if the operators it has are compatible. If not, the connection to this operator will be automatically deleted. If the element is moved to dragged to & dropped on the placeholder, the placeholder will be replaced with it.
|
|
|
Illustration 4-21: The symbol for a placeholder
|
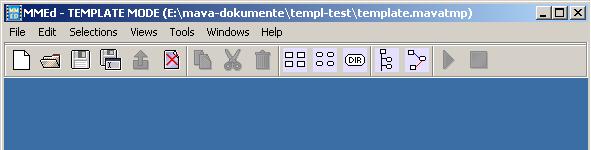
4.4.3 The Template Editing Modus of MMEd
To change a template subsequently, it must to be capable of being edited. Therefore the authoring system MMEd can switch into the template mode. This will happen automatically if you open a template instead of a document. Then you can edit and save the template as if it would be a document. Naturally, you cannot play out templates, this works only with documents.
Illustration 4-22 shows the title of MMEd, if it was started in the template mode. Since templates contrary to documents do not have names, it is indicated that the authoring system is in the template modus.
|
|
|
Illustration 4-22: The template editing mode of MMEd
|
4.5 Properties and Statistics
In order to handle documents their properties can be specified by the author. This can be done by means of the document properties dialog. To get information on a document you can open the document statistics dialog.
4.5.1 Document Properties
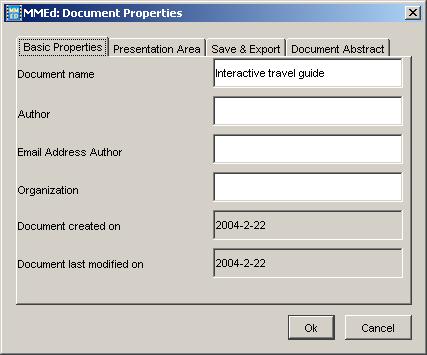
The characteristics of a document, which apply to a document in common, are specified in the document properties dialog. The document properties dialog contains four tabs, which are described in the following.
In the first tab, "Basic Properties" it is possible to determine or change a document name, the name of author, the author's email address and the name of the organization. Additionally, this tab contains two fields for information on the dates of creation and of the last change. This information is managed automatically by the authoring system. Other systems, which handle MAVA documents, can evaluate this information.
|
|
|
Illustration 4-23: Document properties - Basic properties
|
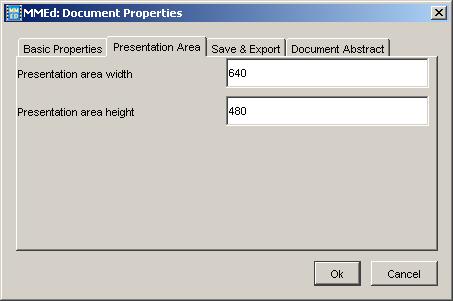
In the tab "Presentation Area" you can determine the size of your document's presentation surface (in pixels) entering a value for the width and the height of the presentation. The presentation surface shown in illustration 4-24 is 640 pixels wide and 480 pixels high.
|
|
|
AIllustration 4-24: Document properties - Presentation Area
|
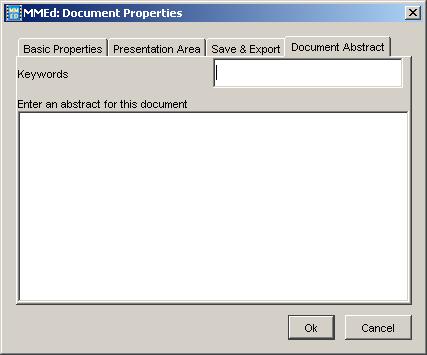
In the tab "Document Abstract" a short textual abstract of the document can be entered. If other applications, for instance a digital library, load and run the document, the abstract is made available to them by meta data. Also it is possible to add keywords to a document.
|
|
|
Illustration 4-25: Document Properties - Document Abstract
|
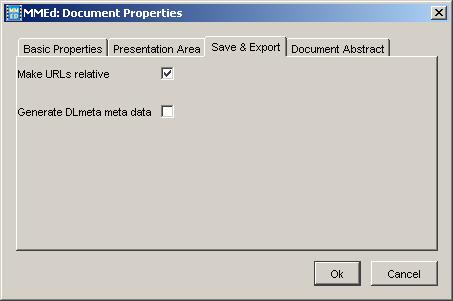
In the "Save & Export" tab properties of saving and exporting of documents can be specified. In the first tab it can be specified that, if a media data URL links to a subdirectory of the document, it automatically has to be converted into a relative URL to the document root. If a document is saved under "c:\document" and a picture in the subdirectory "c:\document\images\image.jpg", during the storing an URL is produced, which is relative to the document, thus "images\image.jpg". Thereby the documents can be moved easily into other directories, since it is not necessary to change relative URLs, contrary to absolute URLs.
The tab allows the creation of DLmeta meta data. If this feature is activated, on generating the playing format, DLmeta meta data - a XML format standardized for digital libraries - is integrated into the document. These meta data can be accessed and processed by corresponding tools in digital libraries. It is obvious that an open standard for storage of MAVA documents is of advantage, since due to the use of XML other tools can easily read and process the document without knowing the MAVA Multimedia Suite.
|
|
|
Illustration 4-26: Document Properties
|
4.5.2 Element properties
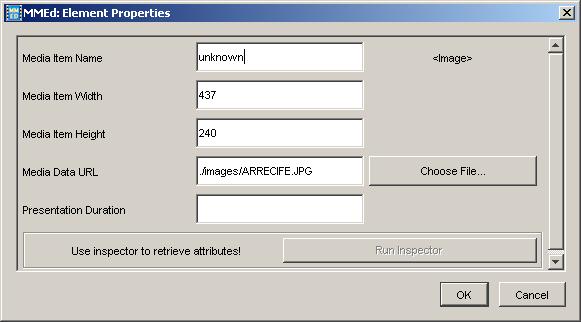
By means of the element properties dialog, the parameter values of media items, containers and operators can be determined. In the icon view and the navigator you can open the element properties dialog using the context menu of an element. In the icon view, there is an additional possibility to open the dialog by double-clicking on an element icon. If you leave the mouse cursor over the icon of an element, MMEd will display a short summary of the its properties.
|
|
|
Illustration 4-27: The element properties dialog
|
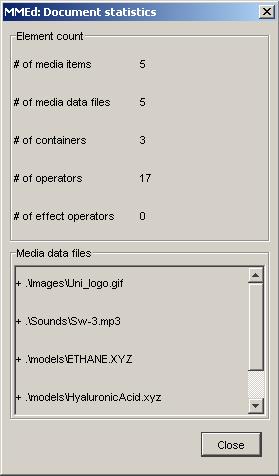
4.5.3 Document Statistics
The document statistics dialog (illustration 4-28) shows information on the number and types of elements the currently opened document consists of. Additionally there is indicated, how many different media files are used in the document and if the system is able to locate them. This information is shown in the lower part of the dialog. The paths to the media files are displayed as list. A "+" indicates, that the corresponding file exists, a "-" indicates that it doesn't exist.
|
|
|
Illustration 4-28: The documents statistics dialog
|
4.6 Summary
This chapter made you acquainted with the advanced use of MMEd. It described the concepts of MMEd and explained their use. If you use these features, the production of multimedia documents will become more simple. This chapter provided a base for an advanced usage of the MAVA Multimedia Suite.
|